Getting Started with Node.js on Windows
The intarwebz has been abuzz for a while about Node.js and being the intrepid explorer of things I don’t know, I figured I would take a look at it. I’ve been working like a rabid code monkey for weeks now and haven’t had hardly any time for fun coding so I needed something to stretch my brain anyway. So far Node.js is fun, it feels kinda raw…kinda low level and it is very different from what I’m used to. And even though the documentation is a bit sparse, it is very approachable to the Windows user. So I’m going to help get you started.
And just in case you were wondering, no, this is not a Microsoft project. You won’t find Visual Studio projects (at least yet). This is an open-source project that’s more popular in the Ruby crowd than the Microsoft crowd.
What Is Node.js?
For the official description, check out the Node.js home page. In my own words, I would describe it as…

...or perhaps...
- A small web platform that lets you build websites using Javascript that runs on the server-side. In other words, write websites in Javascript instead of C#, Ruby, etc.
- A platform that assigns requests to processes and not threads that uses callbacks for I/O operations (disk or network, for example) instead of blocking threads with the goal of being able to handle more requests.
Make sense? Hope so. If not…read elsewhere. I’m going to move on to some code.
Getting Started on Windows
One of my favorite things about this project is that you don’t have to install a single thing to create a Node.js site.
Step 1, go to http://node-js.prcn.co.cc/, download the latest release (this post was written using 0.4.6), and unzip it somewhere on your hard drive. You should have somewhere around 26 files. The file is apparently zipped using 7zip, which you can download for free here.
Step 2, create a Javascript file in that directory and put the following code in it.
var http = require('http');

http.createServer(function (request, response) {

    console.log('request starting...');

	response.writeHead(200, { 'Content-Type': 'text/html' });

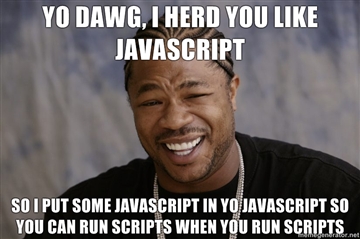
	var html = '<p>Yo dawg, I herd you like Javascript so I put Javascript in yo Javascript so you can run scripts in yo scripts.</p>'
	html += '<script type="text/javascript">alert("Yo dawg, I herd you like Javascript so I put Javascript in yo Javascript so you can run scripts in yo scripts.");</script>';

	response.end(html, 'utf-8');

}).listen(8125);

console.log('Server running at http://127.0.0.1:8125/');
Step 3, open up a command prompt in that directory. If you are running Windows 7, you can just hold down the shift key, right-click there in explorer and click “Open Command Window Here”. Assuming you put the above Javascript in a file named “basic.js”, run “node basic.js”. It should tell you “Server running at http://127.0.0.1:8125”.
Step 4, open up your browser and go to that address. You’ll get a javascript alert and a basic page rendered. Congratulations, you’ve created your first node.js site!
What Is Going On In That Code?
Line 1 – Brings in the http module. This module is what you use to do http kinda stuff, like startup the server.
Line 3 – This starts the server listening on port 8125 (which is on line 14). With the function on this line you define the callback that will execute when an incoming request is detected.
Line 5 – This will write a message out to the console window in which you started the server.
Line 7 – This writes out an http response of 200 and sets the content-type header, all of which tells the browser “hey, this request worked awesomely.”.
Lines 9-10 - I build some html to return. Normally you probably wouldn’t return content like this. I’ll show an example of how to do otherwise in a different post. But for now, this will work.
Line 12 – This ends the response stream passing in the content and the encoding to use for the content.
Line 14 – As mentioned above, this specifies the port to listen on.
Line 16 – The log command that puts the first message you see on the command line when you run the server.
And That’s It Folks!
So that’s all you have to do to get started. You now have a basic page up and running without having to actually install anything or use any IDE. I’ll post an example of how to read an html file off the disk soon and then we’ll see where we go with this thing.