Create React App and Express
Are you writing something using React? Are you needing a custom Node/Express server-side piece to go with it? If so and you're not sure how to do it, this is for you. In this post I'm going use create-react-app to create a very basic React application, make it run alongside an express server for custom server-side logic, and deploy it to Heroku.
Here are my assumptions about you, dear reader: this post is meant to explain things to those who have a basic knowledge of React, Express, Node, Terminal, and Git. If you want to follow along, you will need accounts on both Github and Heroku. I also assume you have a text editor installed as well as create-react-app. I also assume for all terminal things that you are working on macOS.
This post is based on a simple but extremely useful Github repo by Mars Hall. He shows an example of how to do it. I'm going to walk through the process and attempt to explain why it works.
Step #1: Create a Github Repo
We are starting a new project, so we need a new Github repo. Go create a new repository, get the url for it, open terminal, and clone. To get that url, you're going to look for something like this when you have create the repo.

Now you just need to git clone [url] in the terminal to get started with this repo. Also, for the rest of this, all code changes will be in this repo. If you want to see what it will look like when we're all done, just take a look at Mars' repo. Mine would be 99% like it and I'm going going to make one small change.
Step 2: Basic Setup
In this step we will get all the basic pieces in place.
So now you should have a repo cloned to your computer. You should also be in that directory. If you are not, you need to move there because the terminal commands we are about to run need to be run in the right place. If you are not sure, you can run pwd in terminal and see where you are right now. Then cd till you are in the right place.
Okay, so we have cloned a basic repository. If the repo doesn't already contain a .gitignore file, you need to create one right now. I would recommend putting this stuff in it.
# we don't want to put all our node dependencies under source control
node_modules
# this file might get auto-created for you on macOS and we don't need it.
.DS_Store
# this will be for the react stuff. I'll explain it later.
react-ui/build
Next we want to use create-react-app to create our react app, so in the terminal run create-react-app react-ui. This will probably take a little while to run and will create a react app in a folder called react-ui. You can choose a different folder name but if you do, you'll need to modify things below. So be warned.
Next, we need a package.json file since we'll be running express, so run npm init in the terminal. At this point you don't need to tweak the settings, so you can just hit enter a bunch of times until the file is created.
And finally (for this step), create a folder called server and in that folder, create a file called server.js. Don't add anything to it yet.
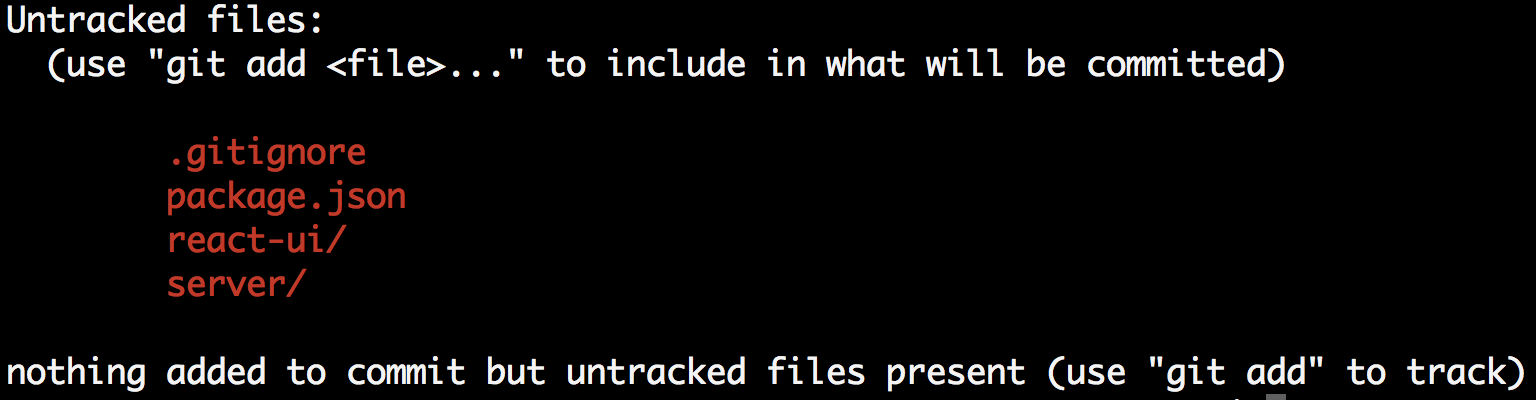
If you do a git status at this point, you should see the following:
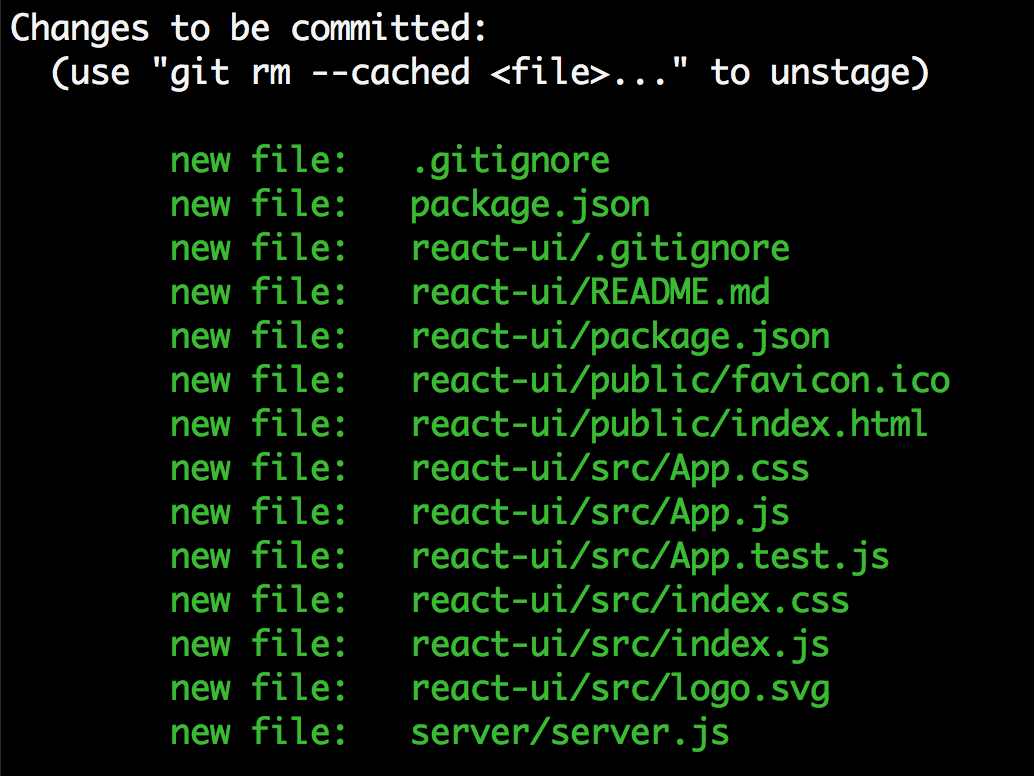
If you add them, you can then see all the files individually. You should see this.
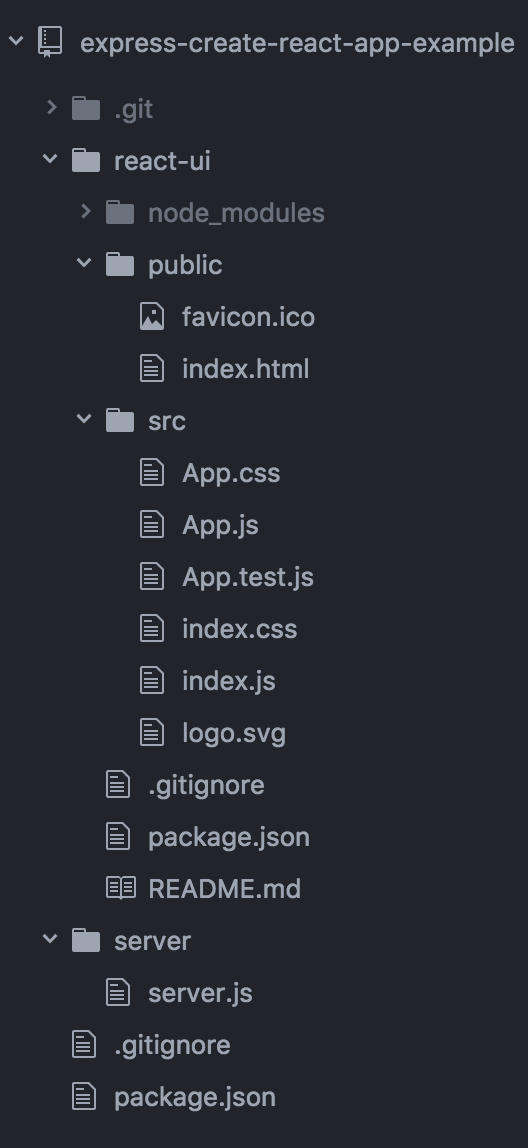
If you prefer the view from Atom, here you go.
Before moving on, make sure you have all that setup.
Step Three: Setup the Server
This server uses express, so we should install it. In the terminal, in the root of this application, run npm install express --save. This will install express and add it to your package.json.
Open the server.js file and put this code in there. We can use this exactly as it is. Now, let me explain.
- Lines 1-2: Importing node modules,
expressfor creating the express app andpathfor figuring out the proper file path for where you files will be below. - Line 4: Create the express app object. You use this to setup your express app.
- Line 5: When you run a server, you need a port to run on. When you run your site on Heroku, they will determine your port and will put that port number in your environment variables, which will be located at
process.env.PORT. If there is nothing there, meaning you are running locally, it will use port 5000. - Line 8: This is where you tell express to locate your static files. Since we are using create-react-app, we are going to let it create those files, and when it does, it puts them in a folder called
build. That is why this folder is used here. - Lines 11-14: A sample API. This is like what you would do if you were creating your own.
- Lines 17-19: If you are doing any sort of client-side routing with something like ReactRouter, then these lines are for you. If any requests to the server don't match the API above, they will match this above and the static React assets that are your React app will be returned.
- Lines 21-23: Starts the server listening at the port specified above.
Step 4: Setup package.json
Take a look at Mars' package.json original, lines 9 and 10. I am going to tweak the first a bit.
"scripts": {
  "start": "node server/server.js",
  "heroku-postbuild": "cd react-ui/ && npm install --only=dev && npm install && npm run build"
},
Replace what you have in your package.json with this. The first command is one that you'll run in development to start your express server. The second is one that will run on Heroku when your app is deployed. I'll explain this last one more in a bit.
Step 5: Setup React App to Proxy to Server
Next, you'll need to setup your react app to proxy through to this server you just created. Open the package.json in the react-ui folder and add a line to have the react app proxy. The line looks like this: "proxy": "http://localhost:5000/"
.
No more code changes to make this work! Make sure everything is committed and pushed up to Github. Time to deploy.
Step 6: Deploy to Heroku
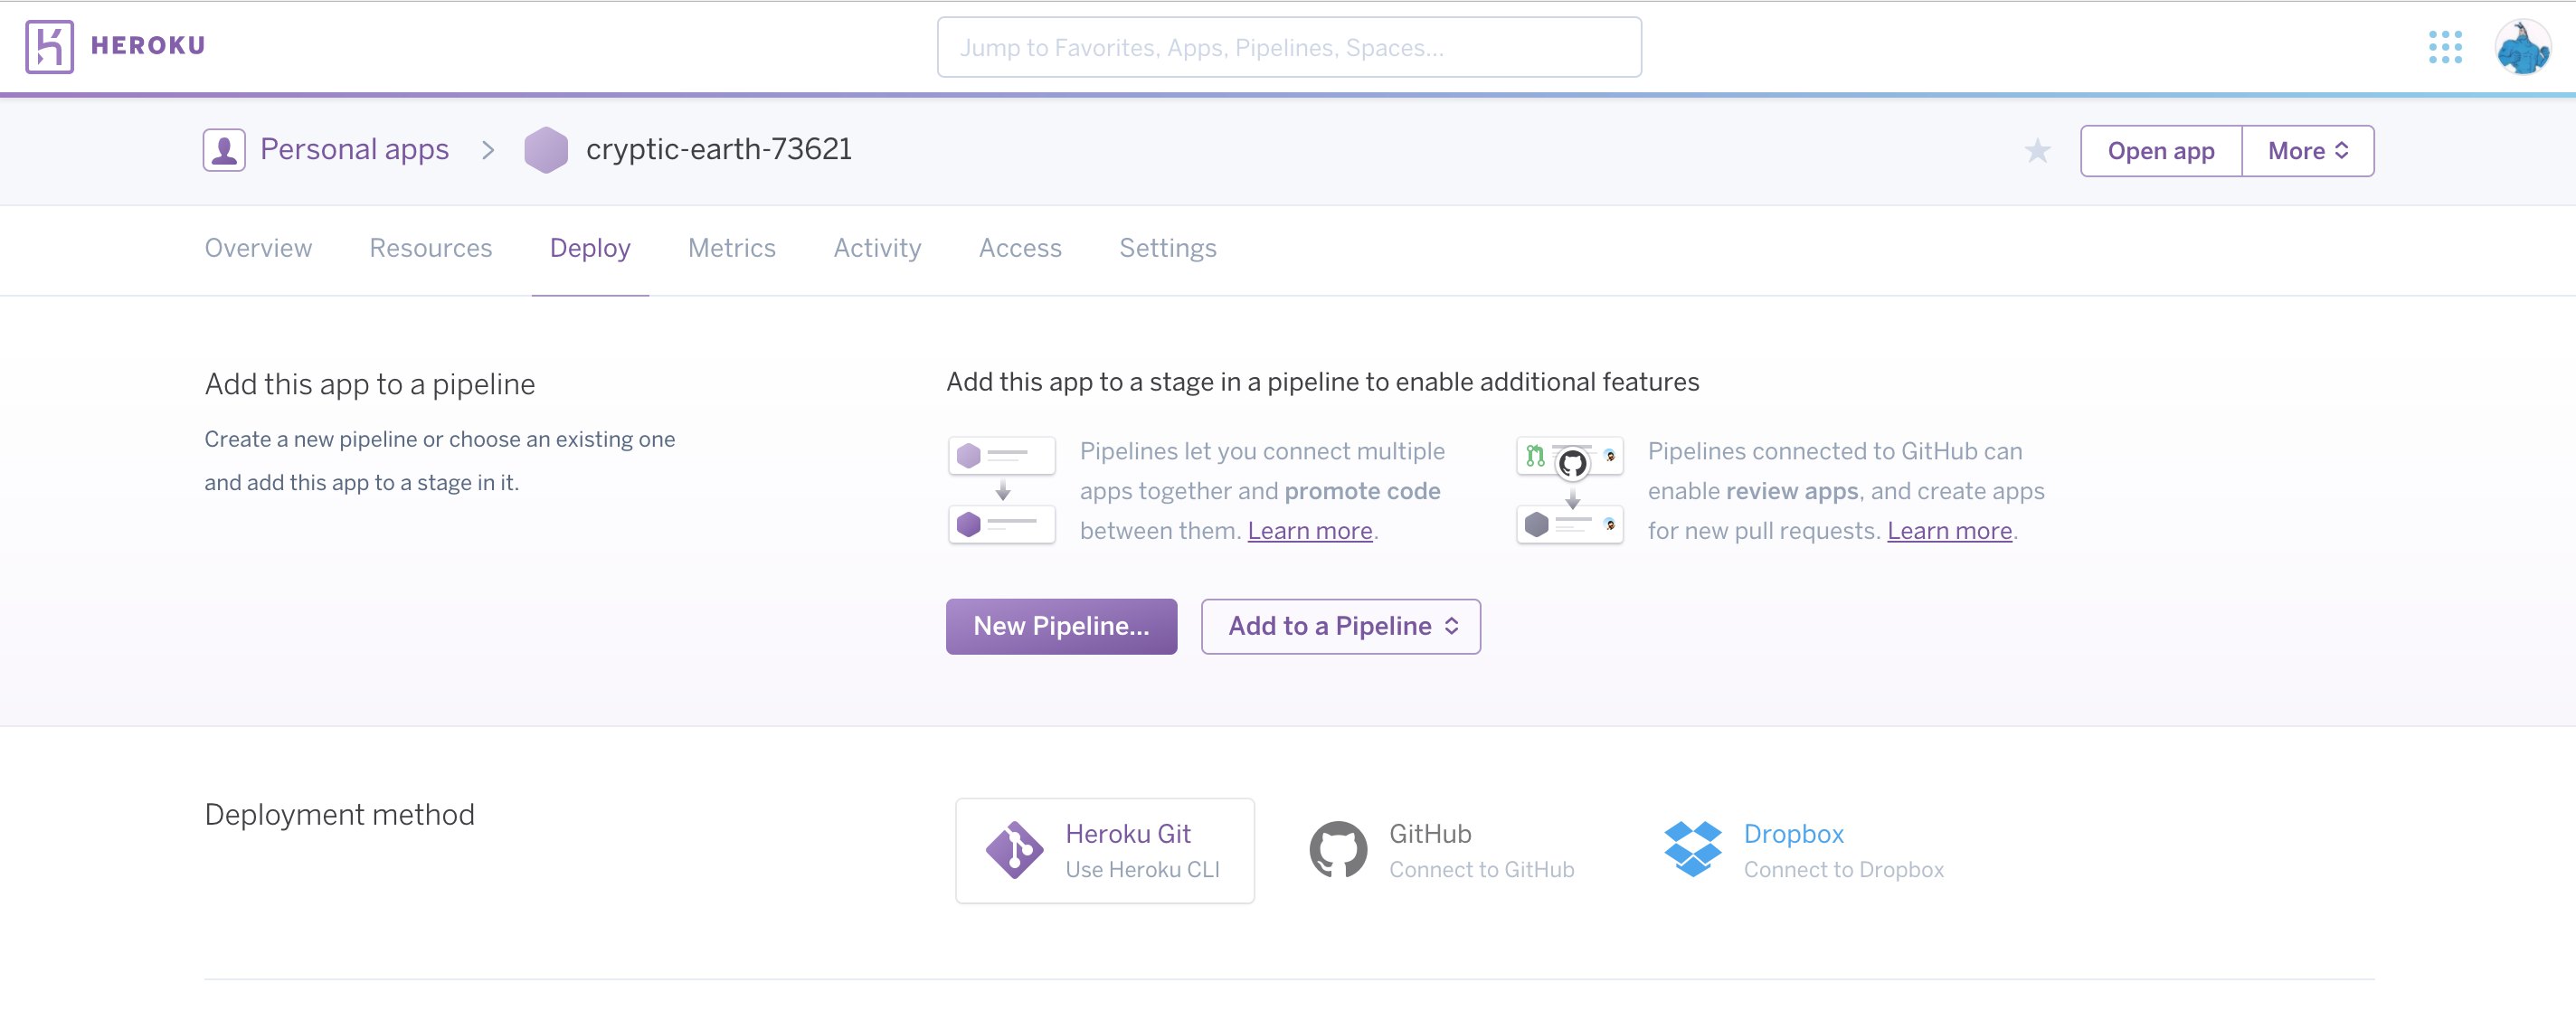
Create a new app on Heroku. You can name it or let it auto-generate a name for you. Doesn't matter. You want to go view the page for the app. It will look something like this:
Choose the Github option and find your repo.
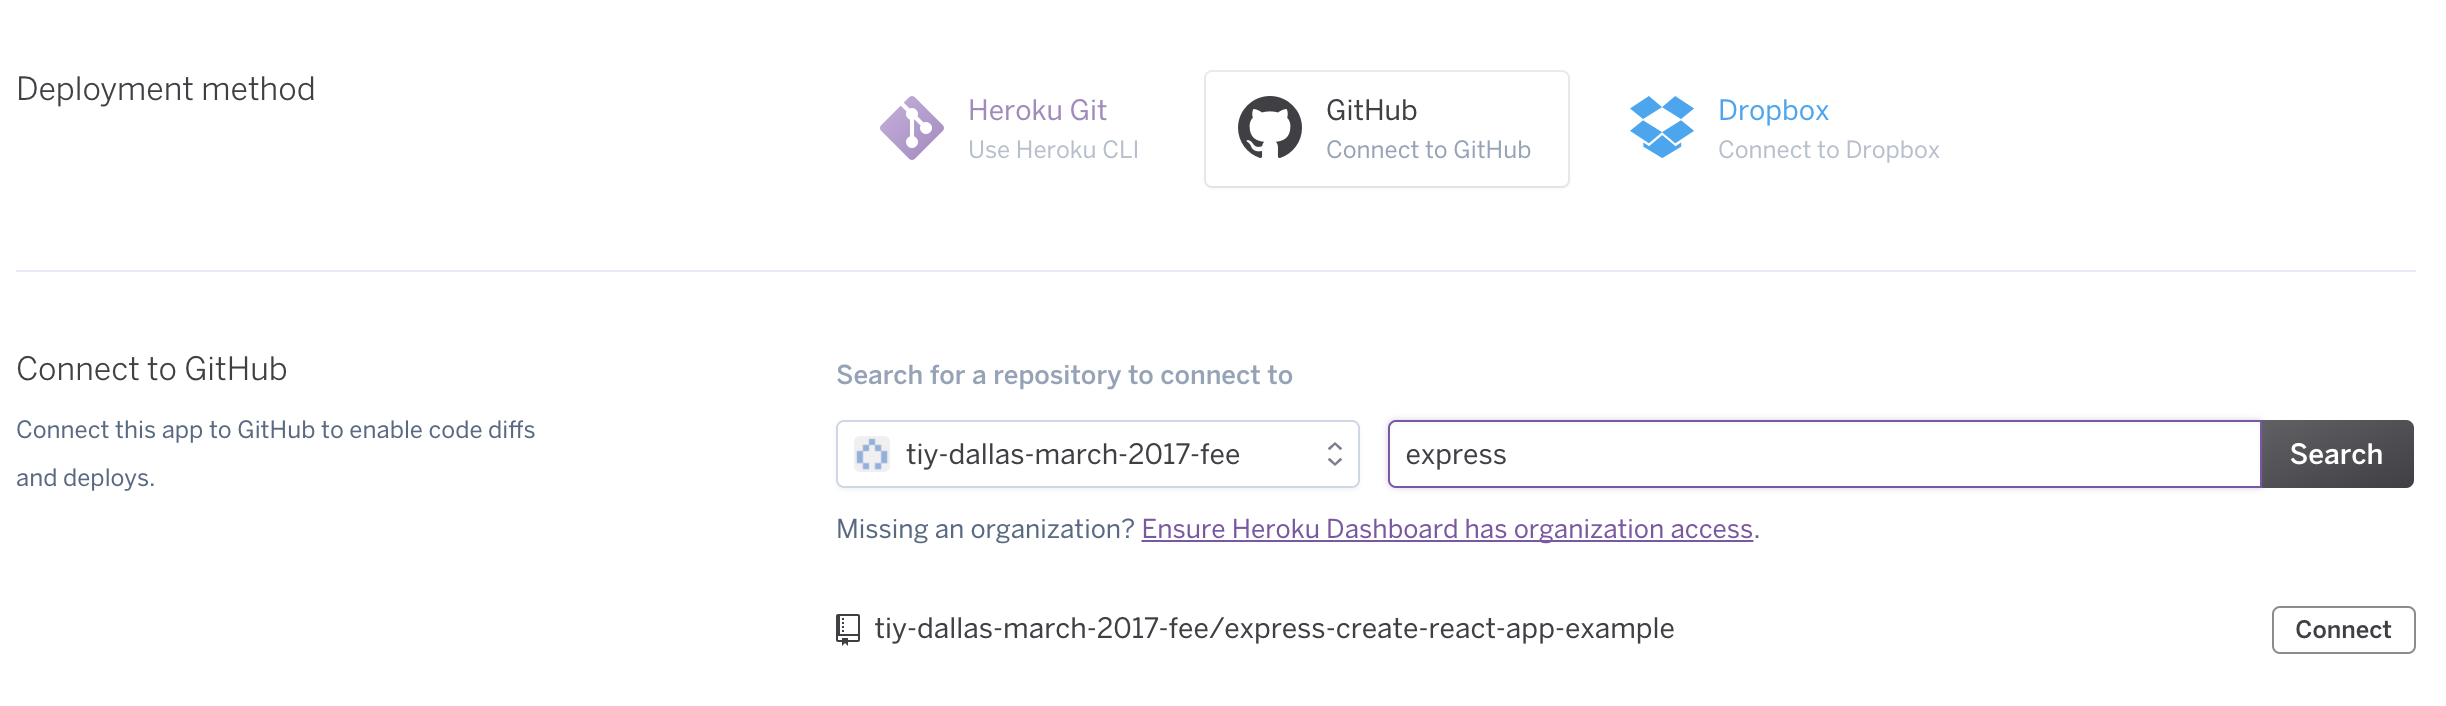
Hit connect. After that is connected, hit "Enable Automatic Deploys" and then "Deploy Branch". After a few minutes it should be deployed. Also, any time you push your app to Github, it will automatically deploy.
What Is Going On? The Big Picture.
We are done! This works! But how?
In Development
In development, you'll need to run the server and the react app at the same time. This means you will need two terminal windows. In one you can run npm start from the react-ui folder. This will start create-react-app at http://localhost:3000 like normal. In the other you run npm start from the root, which will run express at http://localhost:5000.
In development, all the ajax calls from the React app will get proxied through the development server and you can do whatever server-side api calls you want to make to avoid CORS, whatever CSV parsing you want to do, or database queries you want to run.
In Production
When deployed to Heroku, heroku won't be running the create-react-app server like you do in development. Instead, it will run a npm run build command to make an optimized production build of your react app and will put it in the folder react-ui/build. This is why we created the npm script for heroku above and why static files are being served from react-ui/build. However Heroku is running your Express app, which is still going to make your api calls, csv parsing, or database queries happen.